
Cài Asterisk lên CentOS
– Trước tiên bạn phải update OS bằng lệnh sau:
yum update -y
– Disable SELinux:
sed -i s/SELINUX=enforcing/SELINUX=disabled/g /etc/selinux/config
– Sau khi disable SELinux, bạn reboot CentOS:
reboot
– Tiếp theo cài các gói cần thiết để chuẩn bị cài Asterisk:
yum install -y make wget openssl-devel ncurses-devel newt-devel libxml2-devel kernel-devel gcc gcc-c++ sqlite-devel libuuid-devel
– Thay đổi đường dẫn chức source code tải về:
cd /usr/src/
– Download các bản mới nhất bằng lệnh (gõ từng dòng để thực hiện download về máy)
wget http://downloads.asterisk.org/pub/telephony/dahdi-linux-complete/dahdi-linux-complete-current.tar.gz
wget http://downloads.asterisk.org/pub/telephony/libpri/libpri-1.4-current.tar.gz
wget http://downloads.asterisk.org/pub/telephony/asterisk/asterisk-11-current.tar.gz
– Giải nén các file đã tải về bằng các lệnh:
tar zxvf dahdi-linux-complete*
tar zxvf libpri*
tar zxvf asterisk*
– Bước tiếp theo bạn phải cài theo đúng thứ tự: DAHDI, libpri, Asterisk:
– Cài DAHDI:
cd /usr/src/dahdi-linux-complete*
make && make install && make config
– Cài libpri:
cd /usr/src/libpri*
make && make install
– Thay đổi đường dẫn vào thư mục Asterisk:
cd /usr/src/asterisk*
– Nếu bạn cài Asterisk trên CentOS 32bit thì gõ lệnh sau:
./configure && make menuselect && make && make install
– Nếu cài trên CentOS 64bit:
./configure --libdir=/usr/lib64 && make menuselect && make && make install
– Tạo file cấu hình mẫu tại /etc/asterisk
make samples
– Add thêm Asterisk vào startup trong /etc/init.d/
make config
– Start DAHDI:
service dahdi start
– Start Asterisk
service asterisk start
– Start Asterisk:
service asterisk start
– Cài driver cho card Sangoma A200 bằng gói wanpipe:
wget ftp://ftp.sangoma.com/linux/current_wanpipe/wanpipe-current.tgz
– Giải nén:
tar xvfz wanpipe-current.tgz
 cd wanpipe-<version>/
– Cài đặt gói wanpipe bằng lệnh:
./Setup install
– Bạn làm theo hướng dẫn sao cho phù hợp với trường hợp của bạn
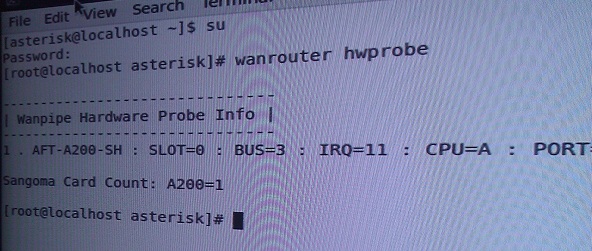
– Cài xong bạn thử lệnh sau để xác nhận cài thành công:
wanrouter hwprobe
Bật giao diện web để cấu hình Asterisk
– Trước tiên cài đặt subversion:
yum install subversion
– Download asterisk-gui:
mkdir -p ~/downloads/asterisk-gui
cd ~/downloads/asterisk-gui
svn checkout http://svn.digium.com/svn/asterisk-gui/trunk .
– Biên dịch source code:
./configure
./make
./make install
– Sao lưu cấu hình Asterisk của bạn
cp -r /etc/asterisk /etc/asterisk.backup
– Cài cấu hình mẫu:
./make samples
– Chỉnh sửa file /etc/asterisk/manager.conf để bật quyền quản lý cho user. Trong [ ] bạn để user tương ứng
enabled = yes
webenabled = yes
[administrator]
secret = mysecret
read = system,call,log,verbose,command,agent,user,config
write = system,call,log,verbose,command,agent,user,config
– Chỉnh sửa file /etc/asterisk/http.conf:
enabled=yes enablestatic=yes bindaddr=127.0.0.1
– Chạy lệnh cuối cùng:
sudo ln -s /var/lib/asterisk/static-http/ /usr/share/asterisk/
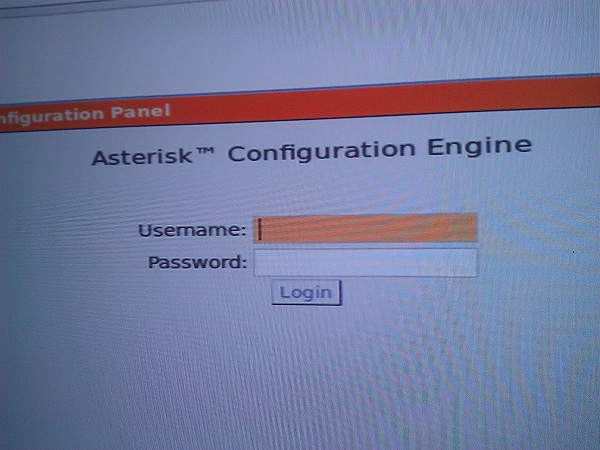
– Sau khi xong cái bước trên bạn vào Firefox và gõ địa chỉ: http://127.0.0.1:8088/asterisk/static/config/cfgbasic.html
– Giao diện login:
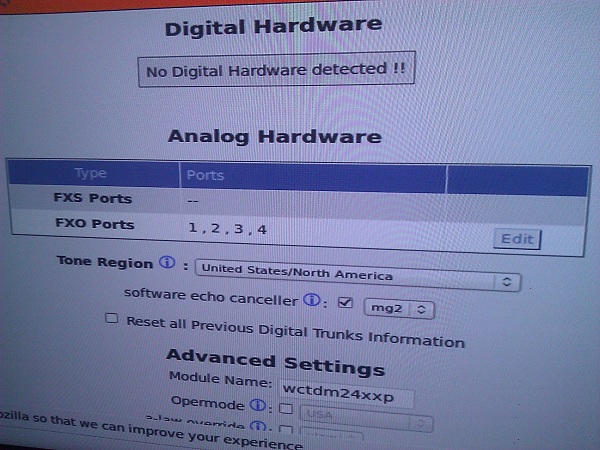
– Cấu hình card analog
Chúc bạn thành công!